How to Use a Blend Node for Masks Substance Designer
Get more out of Allegorithmic's powerful texturing software with these expert tips from artists at Naughty Dog, Santa Monica Studio and Blur Studio
Last month, Gnomon played host to Substance Days, Allegorithmic's worldwide user event for Substance Designer and Substance Painter, its powerful procedural texturing and texture painting software. As well as discussing its product roadmap and unveiling new versions of both Designer and Painter, the company invited four of its best-known users to discuss their own workflows.
Over the course a fascinating day, Rogelio Olguin, Environment Texture Artist at Naughty Dog, Leo Ribeyrolles, CG Artist at Blur Studio, Glauco Longhi, Senior Character Artist at Santa Monica Studio and Christophe Desse, Technical Artist at Naughty Dog provided their power tips for the software, from quick tricks for creating edge wear to the best export settings to use.
You can watch each session in full on Gnomon's Livestream channel, but below, we've picked out 10 highlights, along with the point in the video that the tip can be found. If you're in full-time education, you can download Allegorithmic's new Substance Education Pack – also announced at Substance Days – and follow along for free.
Watch the Substance Days videos on Gnomon's Livestream channel

1. Keep your node graph organized (Substance Designer)
Watch the video (07:30 – 12:30)
In Substance Designer, graphs can get complicated quickly. To avoid confusing coworkers when you pass over materials you have created – or confusing yourself when you come back to a material you haven't worked on for a while – keep your nodes organized, says Rogelio Olguin.
The image above shows the node network for a procedural bricks-and-mortar material. Choosing different inputs for the Pattern Switch section of the graph generates a range of different-shaped bricks and tiles. Note how groups of nodes with a shared function have been grouped into frames (Right-click > Add Frame) and given appropriate names, and kept well separated from one another.
It also helps to work from left to right. In the image above, the frames that generate the height map for the material (Pattern Creation, Pattern, Pattern Switch and Stone Damage and Grout – the latter of which generates the spacing between the bricks, and the wear on their edges) are on the left of the graph; the frames that generate the material properties (Albedo, Roughness and Ambient Occlusion) are to their right; and those that generate the final output are to the far right.
The same holds true for the nodes within a frame: for example, in the Stone Damage and Grout frame, the nodes that generate the largest forms are on the left of the frame. As you move towards the right of the frame, the forms that the nodes generate become progressively smaller and smaller.
You can also use the vertical axis in the same way. In this example, all the noise sources used to generate wear effects have been moved to the bottom of the graph.

2. Create quick edge wear effects (Substance Designer)
Watch The Video (31:15 - 34:45)
The Directional Warp, Directional Blur and Slope Blur Grayscale nodes are all good for generating realistic-looking irregularities and wear effects in the edges of tessellated materials like bricks and tiles, says Rogelio Olguin.
The video linked above shows their effects on a simple checkerboard pattern (Generators > Patterns > Checker 1). Using a stripe pattern (Generators > Patterns > Stripes) instead would create wood grain effects. To add the nodes themselves, right-click on the graph and choose Add Node, or select them from the Library.
The Directional Warp node can be used in conjunction with a spherical gradient (Generators > Patterns > Shape, then move to the Instance Parameters for the node on the left of the screen, and select Paraboloid from the Pattern rollout) to generate nice organic-looking wavy edges. Connect the pattern source (in this case, the checkerboard) to the Input of the Directional Warp node, and the spherical gradient to its Intensity Input. In the Specific Parameters rollout on the right of the screen, set the Intensity to a low value, and adjust the Warp Angle setting as necessary.
The Directional Blur node works in a similar way, but softens the edges of the pattern.
The Slope Blur Grayscale node can be used in conjunction with a noise source (in this example, Rogelio is using the Cloud 3 noise) to generate edge wear effects. Connect the pattern source to the Grayscale input of the Slope Blur Grayscale node, and the noise source to the Slope input. In the Instance Parameters rollout, set Samples to near the maximum value, and reduce the Intensity.
To refine the edge wear effect, connect a Blur HQ Grayscale node between the noise source and the Slope Blur Grayscale to get a more organic-looking wavy edge. Try different settings from the Mode drop-down of the Instance Parameters. The Min setting moves the edges in; the Max setting moves them out, and can be used to create interesting eroded effects.

3. Painter isn't just for painting! (Substance Painter)
Watch the video (02:00 - 19:00)
Although many people think of Substance Painter as a tool purely for hand-painting, it's also a powerful procedural texturing package. Created to test what is possible using only procedural techniques, Leo Ribeyrolles textured The Soldier, a cyborg character for a short film, in just two days, working part-time.
Leo began by assigning simple base shaders for the character in 3ds Max and test rendering in V-Ray. The character's skin uses the V-Ray skin shader. Rather than spend time setting up complex shaders, the fine detail was created in Substance Painter using Generators and Masks, using layering to build up complexity.
Because the textures are procedural, the output remains fully editable, making it much quicker to accommodate the director's feedback than painting details by hand and using blending modes.
"It's a very efficient workflow: it's more like art direction than texturing," says Leo. "I could create dirt on the character's face in 10 seconds rather than the minutes it would take to paint it in by hand and test the result in V-Ray."
4. But don't rely on procedural tools alone (Substance Painter)
Watch the video (20:40 - 21:40)
While a procedural workflow gets you good results quickly during look development (see Tip 3), for final-quality work, you'll still need to do some hand-painting. Glauco Longhi estimates that procedural techniques get you 75% of the way to a hero-quality asset, but to properly finish the textures, you need to edit or paint in details manually.
"It's hard to make something terrible-looking because you have all these pre-made materials, but to take [the asset] to the next level, you need to hand-paint," he says.

5. Make Painter work with V-Ray (Substance Painter)
Watch the video (26:15 – 30:00)
Substance Painter comes with a range of export presets for getting your texture maps into a range of renderers and game engines, points out Leo Ribeyrolles. For V-Ray, use the Config > Vray option from the Export document... dialog. (If you use a UDIM-based texturing workflow, in Substance Painter 2.1+, choose Vray UDIM instead).
If you're using a standard VRayMtl material inside 3ds Max, and generating texture maps in JPEG format, you need to assign the maps Substance Painter creates to the Diffuse, reflection (Reflect), reflection glossiness (RGlossiness) and Fresnel IOR map slots – the latter is particularly important to get consistent results between the Substance Painter viewport and the final V-Ray render. If you're generating normal or height information, plug it into the Bump map slot.
(Generating textures in EXR format requires fewer maps, as it is no longer necessary to override the default reflection, reflection glossiness or normal map information.)
This set-up gives good results out of the box, although you may want to adjust the settings in the BRDF rollout, particularly GTR tail falloff when using the Microfacet GTR (GGX) option.
6. Edit details in Painter, not ZBrush (Substance Painter)
Watch the video (05:00 – 07:45)
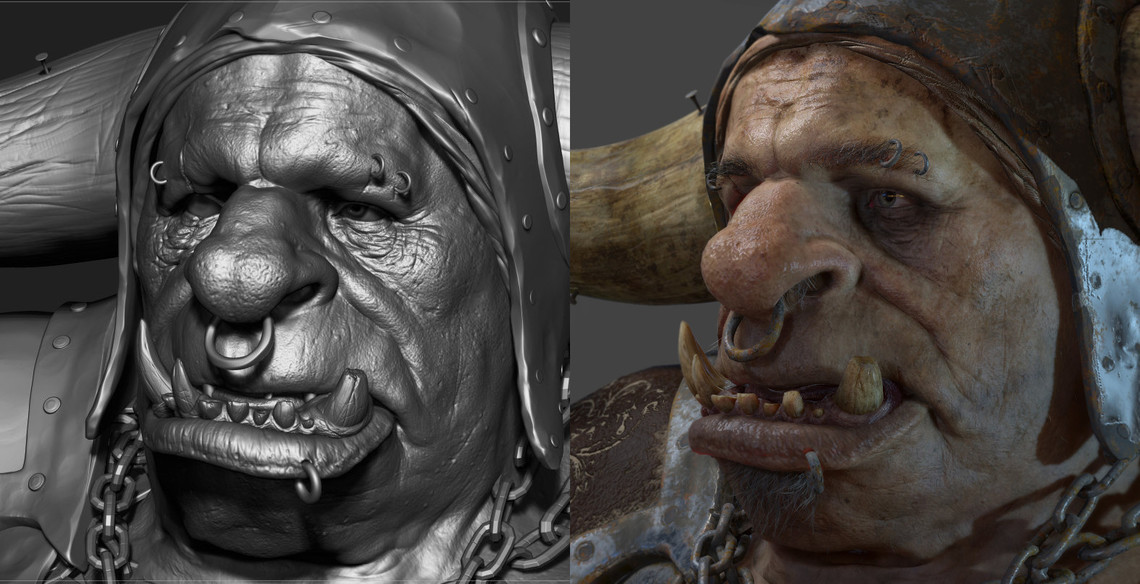
It's tempting to sculpt all of the fine details of an asset in an application like ZBrush, but it's actually quicker and more flexible to add them through textures using Substance Painter, points out Glauco Longhi.
If you compare the render of the orc character (above, right) to the raw ZBrush sculpt (left), you will notice that the fine geometric details of the helmet, like the rust and scratches, have been added through textures. Working in this way, rather than sculpting them into the ZBrush model itself, makes it possible to update the details more quickly during look development, and makes it possible to edit the high-res geometry without losing the details. "It's getting to the point where it's sometimes not worth taking the sculpt to a 100% [level of] finish," says Glauco.
Textures can also be used to soften any unrealistic hard edges in your sculpt: for the orc, Glauco used the normal map to drive the color textures using Generators in Substance Painter, softening the fissures in the teeth and in the horns of the helmet.

7. Use the right ZBrush export settings for Painter (Substance Painter)
Watch the video (17:20 – 18:15)
When exporting your model from ZBrush for use in Substance Painter, uncheck the Grp option in the ZBrush export dialog, advises Glauco Longhi. Doing so exports the sub-meshes of the model – for example, a character and its armor – enabling you to texture them separately, and prevents errors with asset naming when transferring the model between software packages.
For smaller elements that don't use their own sub-mesh – for example, studs or rivets – you can use ZBrush's Polypaint toolset to fill in their outlines, then include the Polypaint data when you export and use it to generate an ID map in Substance Painter, enabling you to isolate the element automatically. To do so, set Color Source to Vertex Color in the ID baker parameters of Painter's Baking dialog.

8. Double your texture resolution before exporting (Substance Painter)
Watch the video (22:15 – 23:15)
Substance Painter lets you paint textures at any resolution you choose, recalculating the maps when you change resolution. It's usually best to work at the resolution at which you're going to use the maps, says Glauco Longhi, but stepping up a resolution level immediately before you export can give extra sharpness in fine details.
To change resolution, use the Size drop-down in the TextureSet settings. Options range from 128 x 128px to 4,096 x 4,096px. Substance Painter 2.1 also introduced experimental support for 8K maps.
9. Give your Smart Materials generic names (Substance Painter)
Watch the video (19:30 – 20:00)
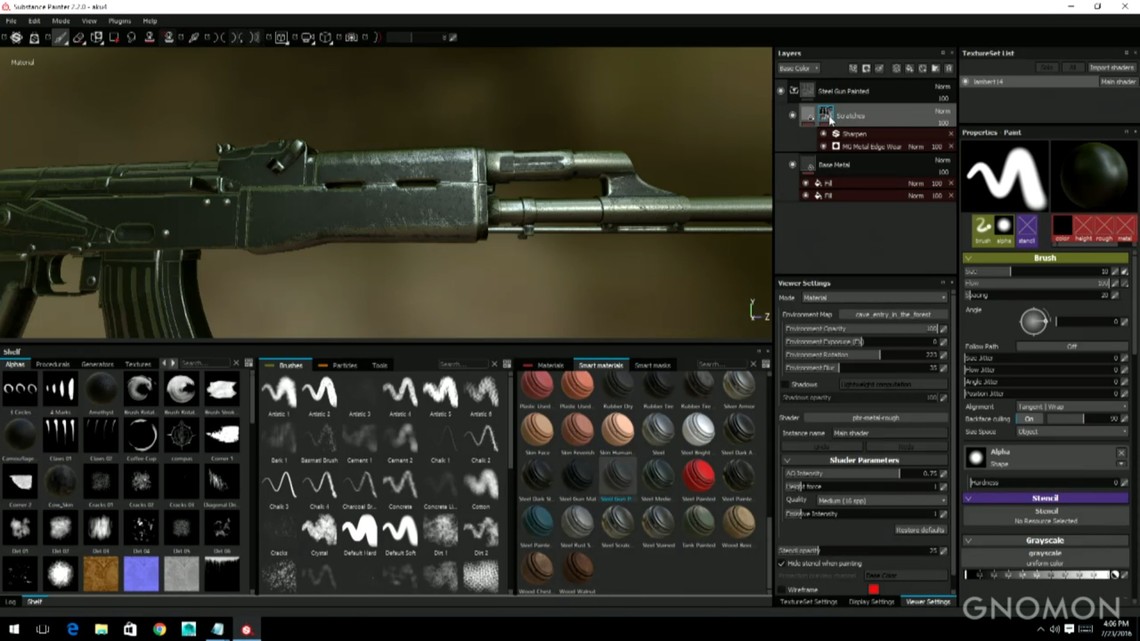
Don't just rely on Substance Painter's preset Smart Materials: force yourself to begin a new Smart Material every time you create a new asset, advises Christophe Desse. By doing so, you will quickly build up a library of custom materials tailored to the needs of your own projects.
Avoid giving Smart Materials very specific names like 'gun scratched metal'. While the material may originally have been created for a gun, that isn't the only situation in which it could be used. Giving a material a more generic name makes you more likely to think of more creative ways in which to reuse it when browsing your library.
10. Get more tutorials free! (Substance Painter)
Watch the video (46:15 – 47:30)
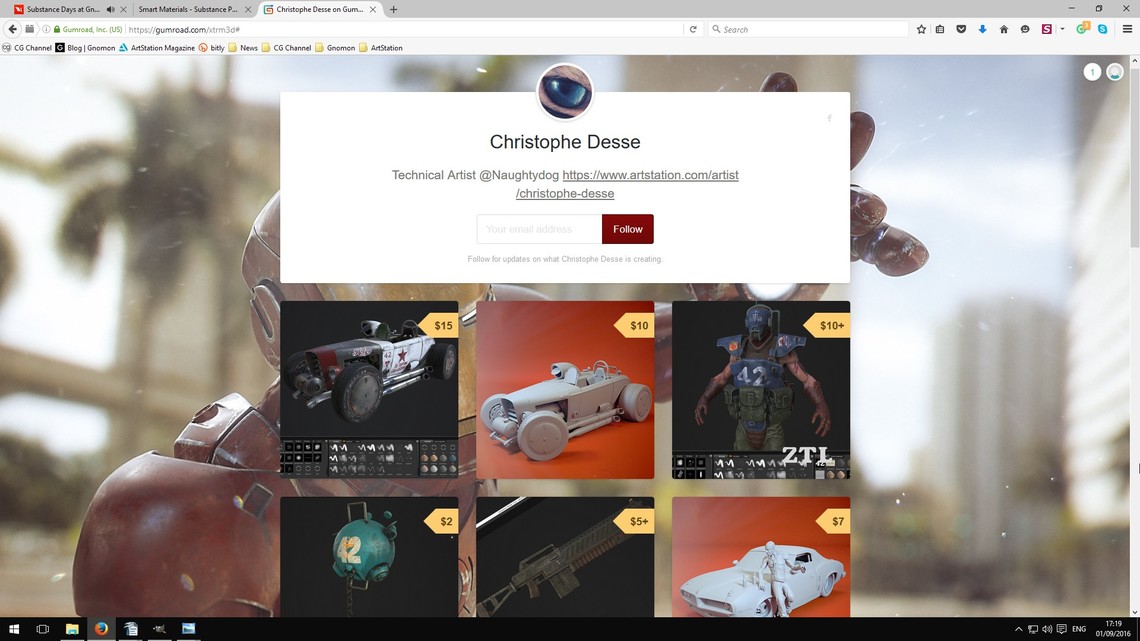
As well as his presentation at Substance Days, Christophe Desse has created a lot of other Substance Painter training. You can find free tutorials on his YouTube channel, and commercial training on his Gumroad page. But if you can't afford to pay, watch the section of the Livestream video linked above: in it, Christophe gives out an offer code that will let you download two of his Gumroad tutorials for free!
Read More
Watch the videos from Substance Days on Gnomon's Livestream channel
Discover Uncharted 4's environment art workflow
Watch Substance tutorials on The Gnomon Workshop
Browse Gnomon's online courses
How to Use a Blend Node for Masks Substance Designer
Source: https://www.gnomon.edu/blog/10-power-tips-for-substance-painter-and-substance-designer
0 Response to "How to Use a Blend Node for Masks Substance Designer"
Enregistrer un commentaire